POM.xml
<dependency>
            <groupId>org.mybatis.spring.boot</groupId>
            <artifactId>mybatis-spring-boot-starter</artifactId>
            <version>2.1.4</version>
        </dependency>
        <dependency>
            <groupId>org.springframework.boot</groupId>
            <artifactId>spring-boot-starter-data-jdbc</artifactId>
        </dependency>
        <dependency>
            <groupId>org.springframework.boot</groupId>
            <artifactId>spring-boot-starter-jdbc</artifactId>
        </dependency>
        <dependency>
            <groupId>org.mariadb.jdbc</groupId>
            <artifactId>mariadb-java-client</artifactId>
            <scope>runtime</scope>
        </dependency>
        <dependency>
            <groupId>mysql</groupId>
            <artifactId>mysql-connector-java</artifactId>
            <scope>runtime</scope>
        </dependency>
        <dependency>
            <groupId>org.springframework.kafka</groupId>
            <artifactId>spring-kafka</artifactId>
        </dependency>
        <dependency>
            <groupId>org.webjars</groupId>
            <artifactId>webjars-locator-core</artifactId>
        </dependency>
        <dependency>
            <groupId>org.webjars</groupId>
            <artifactId>sockjs-client</artifactId>
            <version>1.0.2</version>
        </dependency>
        <dependency>
            <groupId>org.webjars</groupId>
            <artifactId>stomp-websocket</artifactId>
            <version>2.3.3</version>
        </dependency>
        <dependency>
            <groupId>org.springframework</groupId>
            <artifactId>spring-messaging</artifactId>
            <version>${spring-framework.version}</version>
        </dependency>
        <dependency>
            <groupId>org.webjars</groupId>
            <artifactId>bootstrap</artifactId>
            <version>3.3.7</version>
        </dependency>
        <dependency>
            <groupId>org.webjars</groupId>
            <artifactId>jquery</artifactId>
            <version>3.1.1-1</version>
        </dependency>

        <dependency>
            <groupId>org.springframework.boot</groupId>
            <artifactId>spring-boot-starter-web</artifactId>
        </dependency>
        <dependency>
            <groupId>org.springframework.boot</groupId>
            <artifactId>spring-boot-starter-websocket</artifactId>
        </dependency>
        <dependency>
            <groupId>org.springframework.boot</groupId>
            <artifactId>spring-boot-starter-thymeleaf</artifactId>
        </dependency>
        <dependency>
            <groupId>org.projectlombok</groupId>
            <artifactId>lombok</artifactId>
            <optional>true</optional>
        </dependency>
        <dependency>
            <groupId>org.springframework.boot</groupId>
            <artifactId>spring-boot-starter-test</artifactId>
            <scope>test</scope>
        </dependency>
        <dependency>
            <groupId>org.springframework.boot</groupId>
            <artifactId>spring-boot-starter-actuator</artifactId>
        </dependency>
        <dependency>
            <groupId>org.springframework.boot</groupId>
            <artifactId>spring-boot-starter-data-jpa</artifactId>
        </dependency>
사용중인 dependency
웹 HTML 파일
<!DOCTYPE html>
<html lang="en">

<head>
    <meta http-equiv="Content-Type" content="text/html; charset=UTF-8">
    <title>Your First WebSocket!</title>
    <script src="https://cdnjs.cloudflare.com/ajax/libs/sockjs-client/1.5.2/sockjs.min.js"></script>
    <script src="https://cdnjs.cloudflare.com/ajax/libs/stomp.js/2.3.3/stomp.min.js"></script>
    <script src="https://code.jquery.com/jquery-3.6.0.min.js"
            integrity="sha256-/xUj+3OJU5yExlq6GSYGSHk7tPXikynS7ogEvDej/m4="
            crossorigin="anonymous"></script>
</head>

<body>
<script type="text/javascript">
        // var wsUri = "http://localhost/websocket";
        var wsUri = "";
        var stompClient;
        var output;
        var textMessge;
        var textUser;
        var textRoom;
        connect();

        function init() {
            output = document.getElementById("output");
            textMessge = document.getElementById("textMessge");
            textUser = document.getElementById("textUser");
            textRoom = document.getElementById("textRoom");

            if(getParam("user") !== "") document.getElementById("textUser").value = getParam("user");
            if(getParam("user") !== "") document.getElementById("textRoom").value = getParam("room");
        }
        function connect() {
            var socket = new SockJS(wsUri);
            stompClient = Stomp.over(socket);
            stompClient.connect({}, function (frame) {
                onOpen();
                console.log('Connected: ' + frame);
                stompClient.subscribe('/topic/greetings', function (greeting) {
                    onMessage(JSON.parse(greeting.body).content);
                });
                stompClient.subscribe('/subscribe/notice' + document.getElementById("textRoom").value, function (message) {
                    onMessage(message.body);
                });
            });
        }

        function disconnect() {
            if (stompClient !== null) {
                stompClient.disconnect();
            }
            onClose();
            console.log("Disconnected");
        }

        function send_message() {
            var message = textMessge.value;
            var user = textUser.value;
            var room = textRoom.value;
            // writeToScreen("Message Sent: " + message);
            stompClient.send("/app/message", {}, JSON.stringify({ 'message': message, 'user' : user, 'room' : room }));
        }

        function onOpen() {
            writeToScreen("Connected to Endpoint!");
        }

        function onClose() {
            writeToScreen("Close from Endpoint!");
        }

        function onMessage(message) {
            writeToScreen("Message Received: " + message);
        }

        function writeToScreen(message) {
            var pre = document.createElement("p");
            pre.style.wordWrap = "break-word";
            pre.innerHTML = message;
            output.appendChild(pre);
        }

        function getParam(sname) {

            var params = location.search.substr(location.search.indexOf("?") + 1);
            var sval = "";
            params = params.split("&");
            for (var i = 0; i < params.length; i++) {
                temp = params[i].split("=");
                if ([temp[0]] == sname) { sval = temp[1]; }
            }
            return sval;

        }

        window.addEventListener("load", init, false);


    </script>
<h1 style="text-align: center;">Hello World WebSocket Client</h1>
<br>
<div style="text-align: center;">
    <form action="">
        <input onclick="connect()" value="Connect" type="button">
        <input onclick="send_message()" value="Send" type="button">
        <input id="msgIdx" type="hidden"/>
        <input id="prevBtn" value="prev" type="button">
        <input id="textMessge" name="message" value="Hello WebSocket!" type="text">
        <input id="textUser" name="user" value="aaa" type="hidden">
        <input id="textRoom"  name="room" value="1" type="hidden">
        <br>
    </form>
</div>
<div id="output"></div>
</body>

</html>
<script>
    $(function(){


        var url = "/data/lastidx?room="+getParam("room");
        $.ajax({
            type : "GET",            // HTTP method type(GET, POST) 형식이다.
            url : url,      // 컨트롤러에서 대기중인 URL 주소이다.
            success : function(res){ // 비동기통신의 성공일경우 success콜백으로 들어옵니다. 'res'는 응답받은 데이터이다.
                // 응답코드 > 0000
                $("#msgIdx").val(res.data)

            },
            error : function(XMLHttpRequest, textStatus, errorThrown){ // 비동기 통신이 실패할경우 error 콜백으로 들어옵니다.
                console.log("통신 실패.")
            }
        });

        $("#prevBtn").on("click", function(){

            var url = "/data?room="+getParam("room");
            var idx = $("#msgIdx").val();
            if(idx !== "") {
                url += "&idx="+idx;
            }
            $.ajax({
                type : "GET",            // HTTP method type(GET, POST) 형식이다.
                url : url,      // 컨트롤러에서 대기중인 URL 주소이다.
                success : function(res){ // 비동기통신의 성공일경우 success콜백으로 들어옵니다. 'res'는 응답받은 데이터이다.
                    // 응답코드 > 0000
                    for(var key in res.data) {
                        console.log(res.data[key]);
                        $("#msgIdx").val(res.data[key].idx)
                        $("#output").prepend("<p style=\"overflow-wrap: break-word;\">prev data : "
                            + res.data[key].user + "|"
                            + res.data[key].room + ":"
                            + res.data[key].message + "/"
                            + res.data[key].timestamp
                            +"</p>")
                    }

                },
                error : function(XMLHttpRequest, textStatus, errorThrown){ // 비동기 통신이 실패할경우 error 콜백으로 들어옵니다.
                    console.log("통신 실패.")
                }
            });
        });
    });
</script>
room, user Get Parameter를 받아서 처리합니다
room은 내가 접속할 방 번호이며
user는 사용할 닉네임입니다.
이전글을 가져올때 idx를 ajax를 통해 서버로 전달하여
추가로 입력된 row 때문에 밀린 row를 신경쓰지 않고 이전글을 가져올 수 있습니다
이렇게 페이징을 처리한 이유는 만약 최신글 order by를 기준으로 데이터를 가져오면
추가로 입력된 메세지 때문에 중복된 데이터를 가져오기 때문입니다
wsUrl를 통하여 웹소켓에 연결되며
send -> kafka 입력
kafka Consumer 감지 > 클라이언트
중간에 kafka를 넣어 소켓이 다른 서버와도 통신이 가능해집니다
소켓서버 접속
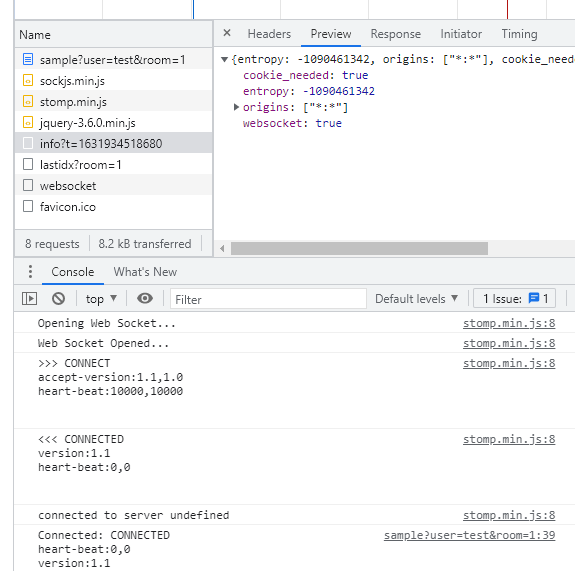
http://localhost/websocket/info?t=1631934518680socket/info?t=1631934518680
위와 같이 /websocket이라는 경로로 소켓이 연결되야 하는데
해당 부분은 api쪽에서도 해당 경로를 열어줘야 합니다
@Configuration
@EnableWebSocketMessageBroker
public class WebSocketConfig implements WebSocketMessageBrokerConfigurer {
    @Override
    public void configureMessageBroker(MessageBrokerRegistry registry) {
        registry.enableSimpleBroker("/topic"); // broker 역할 수행시 사용할 prefix
        registry.enableSimpleBroker("/subscribe", "/topic");
        registry.setApplicationDestinationPrefixes("/app"); // 메세지 수신 용 prefix
    }
    @Override
    public void registerStompEndpoints(StompEndpointRegistry registry) {

        registry
        .addEndpoint("/stomp")
        .setAllowedOrigins("*")
        .withSockJS()
        .setStreamBytesLimit(512 * 1024)
        .setHttpMessageCacheSize(1000)
        .setDisconnectDelay(30 * 1000);

        registry.addEndpoint("/websocket");
        registry.addEndpoint("/websocket").setAllowedOrigins("*").withSockJS();
    }
}
addEndpoint를 이용하여 해당 엔드포인트를 추가하고 setAllowedOrigins를 이용하여
CORS쪽 부분을 열어줍니다
send -> kafka 입력
위에 HTML 파일을 보시면
stompClient.connect({}, function (frame) {
  onOpen();
  console.log('Connected: ' + frame);
  stompClient.subscribe('/topic/greetings', function (greeting) {
  	onMessage(JSON.parse(greeting.body).content);
  });
  stompClient.subscribe('/subscribe/notice' + document.getElementById("textRoom").value, function (message) {
  onMessage(message.body);
  });
});
subscribe를 이용하여 연결한 두개 페이지가 있습니다
/topic/greetings는 메세지를 발송할때 사용
/subscribe/notice는 메세지를 받을때 사용
@Slf4j
@Controller
public class MessageHandler {

    @Autowired
    private KafkaTemplate<String, ChattingMessage> kafkaTemplate;

    @Autowired
    private ChattingMapper chattingMapper;

    @Transactional
    @MessageMapping("/message")
    @SendTo("/topic/greetings")
    public void greeting(ChattingMessage message) throws Exception {
        log.info("message received, message:{}", message.toString());
        // 지금 시간을 넣어서 발송
        message.setTimestamp(LocalDateTime.now().toString());
        // RDS에 데이터 입력
        int insert = chattingMapper.insertChatting(message);
        // 정상적으로 데이터가 입력된 경우
        if(insert > 0) {
            // 카프카에 메세지를 push
            kafkaTemplate.send(KafkaConstants.KAFKA_TOPIC, message).get();
        }
    }

}
메세지를 발송한 날짜는 필수로 필요하여 해당 데이터는 서버에서 넣어줬으며
db를 입력 후 카프카에 메세지를 넣어줬습니다
이때 제가 사용한 ChattingMessage 객체를 kafka에서 사용하기 위해선
@EnableKafka
@Configuration
//send message by topic
public class Producerconfig {

    @Bean
    public ProducerFactory<String, ChattingMessage> producerFactory() {
        return new DefaultKafkaProducerFactory<>(producerConfigurations());
    }
    //카프카 프로듀셔 생성
    @Bean
    public Map<String, Object> producerConfigurations() {
        Map<String, Object> configurations = new HashMap<>();
        configurations.put(org.apache.kafka.clients.producer.ProducerConfig.BOOTSTRAP_SERVERS_CONFIG, KafkaConstants.KAFKA_BROKER);
        configurations.put(org.apache.kafka.clients.producer.ProducerConfig.KEY_SERIALIZER_CLASS_CONFIG, StringSerializer.class);
        configurations.put(org.apache.kafka.clients.producer.ProducerConfig.VALUE_SERIALIZER_CLASS_CONFIG, JsonSerializer.class);
        return configurations;
    }

    @Bean
    public KafkaTemplate<String, ChattingMessage> kafkaTemplate() {
        return new KafkaTemplate<>(producerFactory());
    }
}
@EnableKafka를 어노테이션을 이용하여
kafkaTemplate에 해당 객체를 등록해줘야합니다
보낼때 Template을 등록했다면
받을때 역시 Template을 등록해주셔야합니다
@EnableKafka
@Configuration
//receive message by topic
public class ListenerConfig {
    @Bean
    ConcurrentKafkaListenerContainerFactory<String, ChattingMessage> kafkaListenerContainerFactory() {
        ConcurrentKafkaListenerContainerFactory<String, ChattingMessage> factory = new ConcurrentKafkaListenerContainerFactory<>();
        factory.setConsumerFactory(consumerFactory());
        return factory;
    }

    @Bean
    public Map<String, Object> consumerConfigurations() {
        Map<String, Object> configurations = new HashMap<>();
        configurations.put(ConsumerConfig.BOOTSTRAP_SERVERS_CONFIG, KafkaConstants.KAFKA_BROKER);
        configurations.put(ConsumerConfig.GROUP_ID_CONFIG, KafkaConstants.GROUP_ID);
        configurations.put(ConsumerConfig.KEY_DESERIALIZER_CLASS_CONFIG, StringDeserializer.class);
        configurations.put(ConsumerConfig.VALUE_DESERIALIZER_CLASS_CONFIG,  JsonDeserializer.class);
        configurations.put(ConsumerConfig.AUTO_OFFSET_RESET_CONFIG, "latest");
        return configurations;
    }
    @Bean
    public ConsumerFactory<String,ChattingMessage> consumerFactory() {
        return new DefaultKafkaConsumerFactory<>(consumerConfigurations(), new StringDeserializer(), new JsonDeserializer<>(ChattingMessage.class));
    }

}
이때 보시면 중간에 AUTO_OFFSET_RESET_CONFIG가 있는데
쌓여 있는 메세지큐들을 어떻게 가져올지 설정하는곳입니다
- earliest : 최초 데이터부터
- latest : 최신 데이터부터
- none : 이전 오프셋이 없으면 오류 ( 잘 사용하지 않음)
이전 메시지는 데이터베이스를 통하여 가져오기 때문에
최신 데이터만 가져오도록 설정하였습니다
소켓을 연결했고
카프카에 메세지를 Push하였으니
컨슈머 설정을 해야합니다
@Slf4j
@Component
public class MessagingScheduler {

    private SimpMessagingTemplate messagingTemplate;

    @Autowired
    public void setMessagingTemplate(SimpMessagingTemplate messagingTemplate) {
        this.messagingTemplate = messagingTemplate;
    }

    @KafkaListener(topics = KafkaConstants.KAFKA_TOPIC, groupId = "${kafka.group.id:${random.uuid}}")
    public void checkNotice(ChattingMessage message){
        log.info("checkNotice call");
        try{
            messagingTemplate.setMessageConverter(new StringMessageConverter());
            messagingTemplate.convertAndSend("/subscribe/notice" + message.getRoom(), message.getUser() + "|" + message.getRoom() + ":" + message.getMessage() + " / " +message.getTimestamp());
        }catch(Exception ex){
            log.error(ex.getMessage());
        }
    }
}
해당 부분을 처리할떄 groupId가 같다면
서버가 3대라면 한대만 해당 토픽에 접근하는 이슈를 확인하였습니다
그래서 uuid를 통하여 각각 groupId를 유니크값으로 변경하였습니다
@KafkaListener가 카프카에 새로운 메세지를 감지하여
데이터를 Poll 받아 해당되는 Room에 데이터를 보내줍니다.
이전글 가져오기
@GetMapping("/data")
    public ResponseEntity<BaseResponse> selectData(@RequestParam String room, String idx) {

        var chattingMessage = new ChattingMessage();
        chattingMessage.setRoom(room);
        if(idx != null) {
            chattingMessage.setIdx(idx);
        }

        var data = chattingMapper.selectChatting(chattingMessage);
        log.info(data.toString());
        return ResponseEntity.status(HttpStatus.OK).body(new CommonResponse<>(MetaData.builder().result(true).build(), data));
    }
room번호와 idx를 받아와 해당 idx를 기준으로 데이터를 가져옵니다
<select id="selectChatting" parameterType="ChattingMessage" resultType="ChattingMessage">
select `idx`,`room`, `user`, `message`, `timestamp` from test.chatting
<where>
`room` = #{room}
<if test='idx != null'>and `idx` < #{idx}</if>
</where>
order by `idx` desc
limit 10;
</select>
출처 : https://rangerang.tistory.com/75
https://spring.io/guides/gs/messaging-stomp-websocket/
'JAVA' 카테고리의 다른 글
| SpringBoot 설치 / h2 설치 / 쿼리 로그 세팅 (0) | 2021.12.26 |
|---|

댓글